Upon registration, public/private key pair store in uesr’s device. User will hand over public key to the server and server will save this in DB.
The Handshake: Authentication
Upon login, user will be given a “challenge”; random string to sign from server. User will sign this using private key in their device. Server verifies the signature using the public key given in prior.
Why this is better than password
Prevent phishing attack: If you go into the phishing website (let’s say g000gle.com instead of google.com) and they ask it to scan QR code. It will fail because user’s device do not know the privatekey for g000gle.com
When the db is hacked, only things that are exposed is public key not the user private key
Much harder to “guess” the password for attackers (eg: Dictionary attack)
Today, I was working on CICD pipeline automation. But before I describe what I did, I want to describe the situation I was in. So first of all, I had these three deploy-able link which serve the purpose of following:
preview.<domain> : auto-deploy upon PR into main (feature branch into main, that is)
staging.<domain>: auto-deploy upon PR into release
<domain>: this is what user sees, auto-deploy upon merge from main to release.
For preview, I noticed when I have multiple PR into main, only the last PR was reflected. So instead of seeing the fully rendered page on deployed link for each PR, I could only see the last one.
This was rather inconvenient in terms of developer experience.
So for the last two days, I was working on pipeline code and nginx config to fix this issue.
My goal was to have a deployable link that goes like <pr#>.<domain>.
Since our server is running on the local machine with cloudflared tunnel (tldr: it’s a reverse proxy that allow us to have connection with client without actually establishing connection with them ), I needed to configured few things.
First, I added DNS record CNAME so that any 1 level below subdomain will point to my cloudflared tunnel.
Second, I mapped Cloudflared Tunnel so that each request get mapped to appropriate localhost:PORT. For example, if client comes from <domain>, then they get mapped to localhost:3000 because that’s where I’m running my container. Likewise, for any subdomain 1 level below the apex (*.<domain>), it goes to localhost:80 (you might be wondering like ‘ok then how are we gonna serve unique link per pr then?’ -> we’ll get there shortly).
Third, to accommodate for unique link per pr, I made a ansible playbook that automatically generate Nginx mapping file whenever triggered by GitHub workflow.
After which, I had to make workflow for cleaning up annnnnd it took me more time than I expected. Basically, what happend was, in ansible, there was a community module for removing docker image. And my docker image’s name consist with pr-<pr#>:<some_increment>-<some_other_increment>. I didn’t realize that the name had to match, so I for the next few hours I tried my best to find a solution for this without making ansible playbook use shell scrpit ( at that point, it becomes much harder to maintain, mainly because of poor readability of shell script. ). Buut at the end, I ended up just using docker_image_info module and just loop through the every image:tag, and delete the image with matching name. And no, I did not use shell script for this, ansible has built-in module for looping.
I’m happy with the result, it works like a charm. But I’m kinda sad this delayed my side project, but then I’m happy with the learning, mixed feeling I guess.
After a day long of a research (lol), this is the architecture I found for encrypting files (simplified).
Account creation
Upon account creation, Client create Key Encryption Key (KEK) using salt + password with Argon2.
Client generate asymmetric Public Key(PK), Master Encryption Key (MEK).
Client encrypt MEK using AES-256-GCM, and use KEK generated in 1 as encryption key. (we will call Encrypted MEK as EMEK).
Server store EMEK, PK, salt.
Server only see encrypted MEK here and there are no ways for server to roll back EMEK to MEK. Server would have to know KEK. But server only knows salt not the plaintext password since password is hashed using bcrypt (one way hash function),
For Client, when they want to retrieve MEK, they would just have to re-derive KEK since they put their password when they log in.
File upload
Generate 256 bits Data Encryption Key (DEK).
For each chunk in the file, encrypt the chunk using AES_256_GCM with that DEK.
Fetch PK from the server.
Use PK to encrypt DEK using Eliptic-Curve Cryptography (ECC).
Save Encrypted DEK to server
As a result, server will only see encrypted blob of files and only way for server to know the content of files would be when all DEKs of files get compromised. But then that requires MEK to be compromised but we previously have established that is computationally infeasible.
Footnote
For asymmetric/symmetric encryption, you can use any other encryption method as long as they’re reasonably safe (RSA, bcrypt). The reason why I chose ECC/Argon2, is because
ECC: can achieve the same level of security with taking less storage space compare to RSA.
Argon2: resist against GPU attack since Argon2 requires fixed-size memory space for hashing.
During Fall Term, I took a course named “Professional Practice” which features ethic in Computer Science. It taught me lots of valuable lesson especially in regards to privacy. Which is the reason why I came up with this project; web-based E2EE storage solution where server cannot know what user have stored that grantees maximal ownership of their files.
I’ll try to finish the beta version of this project in 7 days (because that’s when my next term begins :( ) and will release it to the public.
For disclaimer, I’ll also mention, that this is my first project where I fully utilize LLM for coding; Now, before anyone make a judgement, I want to bring my point. LLM assisted-coding (or colloquially, vibe-coding) was something I looked down upon so I didn’t really bother using them much. But after some times, as a person dedicated in tech sector, I shouldn’t just ignore certain technology because of my bias; I should at least give them a try. So this is me trying.
For the past 4-ish days of actively using cursor, I realized a significant boost in productivity. In the past (pre chatGPT era), I had to look up multiple stackoverflow post just to get the boiler plate code of certain library I want to be using.. However, LLM does this instantly, saving tons of times that would’ve been spent on searching otherwise. Now, as a responsible programmer, it is still crucial to understand my own codebase. So I still spend some amount of times, studying my code, and look up the documents. I spend equal amount of time on studying my code, it’s just that now I don’t have to spend much times on googling. I think that is significant improvement in efficiency.
However, it’s not all smooth and easy with LLM, there are some challenges too. Since I’m trying to deploy my project on AWS, there are lots of dev-ops involved. And LLM is only helpful for researching in devops, they don’t auto-implement the infrastructure I need (it would be cool if they did in the future! some kind of visual editor where I can vibe code AWS infrastructure). So there are some struggles out there.
Ok, I think I’m digressing. I’ll show you what I’ve made so far and my challenges.
At the start, the following of 4 was done very smoothly
Making Login Page
Session Management using Next-Auth-js
Basic DB setup for storing user info and their file location
Uploading file
For downloading file however, the experience was … quite a journey. At first, I wanted to go easy and just make S3 publicly available for everyone. But then that didn’t really make sense for a storage service. So I steered towards CloudFront signed-cookie where I can grant access to authorized user for certain amount of time. Ok, I just needed to set the cookie of CloudFront’s domain to signed cookie then we’re good to go… except… I was using localhost for my server and CloudFront’s had its domain (let’s say cf.com ). I kept trying to set cookie of cf.com from the localhsot; it just didn’t work and I had no idea why. I spent many excruciating hours into this until I finally came across with Mozila Document, Set-Cookie’s Domain attribute which states
Domain= Optional Defines the host to which the cookie will be sent. Only the current domain can be set as the value, or a domain of a higher order, unless it is a public suffix. Setting the domain will make the cookie available to it, as well as to all its subdomains.
This implied I cannot set cookie of domainB from domainA even if I include domainB in Domain attribute. Ok, then, I just gotta use the same domain cool. So I went to Route53, and decided to purchase a domain, deploy my website on that custom domain and then link CloundFront distribution to the subdomain. Purchasing Domain was quite simple, .click was offered for only $3 per year. However, problem occurred when trying to deploy the Nextjs app to amplify. I noticed amplify is not reflecting environment variable even though I listed them in management console.
I spent another few hours wondering why this is all happening. And then I saw this message in the management console
“…at the build time”, ok so does that mean those environment variable is not available during a runtime? It confuses me because that’s not the impression I got when I was reading through their documents about amplify environment variable where they said
Environment variables are key-value pairs that you can add to your application’s settings to make them available to Amplify Hosting.
I thought “by available to Amplify Hosting” they meant available during runtime. In retrospect, I shouldn’t have assumed anything and should’ve thoroughly check what I’ll be using. I ended up just looked up the stackoverflow post about it and getting it out of the way by editing their build script. (And there were few more instance like this where I spent another another few hours due to mis-configuration..)
After getting this out of the way, I was just exhausted from all the deployment I’ve done and realized I was not making much of a progress in terms of development. So I pivoted, and decided to develop first then think about deployment. And that’s currently where I’m sitting at.
Throughout the past 4~5 days, I think most of my time was spent on the matter like this where either I make wrong assumption about the given information or didn’t inspect thoroughly of what I was doing.
(Oh yeah and about that signed cookie, I just ended up using signed url. This way, I can just pass my signature in the url then redirect. Now that I think about it, anyone with the url can still access the link (albeit for limited time) so I guess I need to figure out how to combat that.
React calculate what the DOM should look like (called “Work-In-Progress”) and what the DOM currently looks like (called “Current”), in virtual DOM DOM (js object). Those were represented as two branches of object trees.
After making those trees, React compare those two branches and find minimum number of step required to make WIP into Current.
Server Rendering
Traditionally, after server generate complete HTML string from component and send to the client, js code for that same component also has to be sent to the client so the Virtual Dom could be build using that function component.
Now here’s where React Server Components kicks in. RSC add the ability to mix server component and client component without having server to send server components code to client. How does React do that? we will explain in the next section
Flight
In order to add VDOM from server component without sending component code, React added ability to serealize React Element Tree returned from server executed functions. The result of server component is serealized and then sent to the client.
While React provides serealization format, meta-framework (eg: Next.js) must do the work of creating/sending payloads. Next.js, for example, has a function in its codebase called generateDynamicRSCPayload.
Not too long ago, I had a competition held within university. It was web-app related and I was supposed to re-design Winnipeg-CrimeStopper website. It was mostly front-end related and I’ve had a lots of fun designing the website.
Now that I got the AWS-SAA certificate, I wanted to host this using my AWS knowledge. As said in the movie, “Oppenheimer”, theory will only take you so far.
Before I begin, I needed to figure out architecutre. Since this is just my side project and I was expecting low traffic. Serverless architecture was the best cost-efficient architecture I could thought of. Here’s the list of service I was gonna use:
Aurora Serverless v2 for DB
Lambda + API Gateway for api request
S3 for static image file
ECS fargate for web-app deployment
First thing first, I was setting up Aurora instance in AWS. But before I initiate my instance, I went into the pricing page of Aurora and found out, while Aurora Serverless v2 does automatically scale from 0.5 ACU to 5 ACU Aurora Serverless v2 techinically incur an idling cost (because it doesn’t scale down to 0 ACU). This implied I had to pay around 40 USD per month minimum.
This didn’t feel much of economical. Besides, I have more and more projects coming so spending $40 monthly just to deploy one project was a bit too priecy for a full time university student making negative wage per hour ;_;
So I needed to come up with alternative. Then I remembered I could use DynamoDB, I quickly went ahead and looked up a pricing
“$0.125 per million read requet units”, this statement alone instantly made me so happy. I can afford that! yay! (But going from RDBMS to NoSQL implies code change and oh no refactoring is so fun)
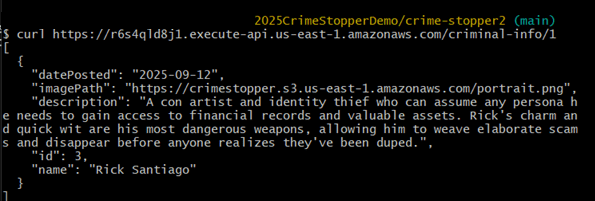
Anyway, now that we take care of this, I set up my lambda function for retreving criminal’s data, and hook it up to API gateway so I can later fetch this data from my web-app.
And I tested the api using command line
After which, I was trying to see if my website works on my local environment; it didnt. It was not fetching data at all. So I looked up the web console and realized I didn’t configure CORS for my api gateway so browser was blocking my request by Same-Origin-Policy
After configuring CORS, web-app on local was working as intended. Now I needed to deploy it.
I was going to
1. containerize
2. and have ECS use that containerized image
buuuuut… deploying react app using vite was rather … time consuming- I wanted to finish this whole deployment within 24 hours otherwise I wouldn’t have time for it. So I needed to find an easier solution.
That’s when I stumble across AWS amplify. It is fully managed service by AWS and all I had to do was to link my github repo into this. So I linked it, waitied, and …
build failed … which was surprising, because “it works on my machine!”
So I tried to dig around looked for a build log
…oh
For some reason, it was running on outdated node v18.20 when it needed to use node v20 or above.
So I went into Build setting -> Advanced setting and match the node version to the same version I’m using on my local machine.
Then finally, finally it worked !!
After confirming deployment, I went to Route53 and purchased domain so it’s more easily recognizable. Here’s the full website.
ohhh I just got the email from AWS saying that I passed the exam. And this is midnight and I get this dopamine rush and I can’t go to sleep now lol. I worked really hard for this and seeing the result come into fruition really does make me feel good.
I learned so much during this journey and now that I know “some” of the aws service (because there are still lots I don’t know lol – aws has 200+ services ). I want to use this knowledge and apply this to my side project. And I’m not talking about using one or two services from AWS, I want to design the whole architecture using AWS.
One of the thing that comes on top of my mind is serverless architecture. Low management overhaed and High scalability sounds too good to be true, so I’m gonna try to apply it for myself and see theory applies into practice.
In terms of what to make, I do have several ideas but I’ll save that for another post. For now, I got some university works to do (Fall term started :( )
Ordered from AWS, Log a job, Device Delievered (not instant)
Data Encryption use KMS
50TB or 80TB Capacity
1 Gbps or 10Gbps Netowrk
if storage is between 10 TB to 10PB, then it’s within economical range, if more, then order multiple Snowball(?)
can send multiple devices to multiple premises
Snowball Edge:
Both Storage and Compute
Larger capaciy than Snowball
10 Gbps, 10/25, 45/50/100Gbps Edge has multiple mode, that is Storage Optimized (with EC2) – 80 TB, 24vCPU, 32 Gib RAM, 1 TB SSD Compute Optimized – 100 TB+7.68NVME, 52 vCPU and 208 GiB RAM Compute with GPU – as above, but with a GPU
Snowball is purely for storage, Edge include compute use Edge when data processing or data ingestion is neededd
Snowmobile:
Portable Data Center within a shipping container on a TRUCK (super cool)
Public, Fully Managed, Highly-Available Queues – Standard or FIFO
Standard guarentee at least one delivery, order is not maintained, FIFO guarantee exactly once, order is maintained
Messages up to 256KB in size – link to large data
Received messages are hidden (VisibilityTimeout) then either reappear (re-try) or are explicitly deleted
Dead-Letter queues can be used for problematic message
ASG can scale and Lambdas invoke based on queues length
SQS billed on ‘request’, 1 request = 1-10 messages up to 64KB total
Encryption at rest & in-transit
SQS Standard vs FIFO:
FIFO:
FIFO is 300 TPS w/o Batching, 3000 with
need FIFO suffix for FIFO
message is delivered exactly once
Standard:
Standard is like multilane highway, near unlimited TPS
faster
order is not guarenteed
message can be delivered more than once
SQS Delay Queues:
make message hidden for x amount of seconds when added to the queue
this is unlike VisibilityTimeout where message is hidden upon being received by consumer
SQS Dead-Letter Queues: Imagine process that keeps failing, we need a way of handling this, this is where Dead-Letter Queue comes in. When ReceiveCount > maxReceiveCount & message isn’t deleted, it’s moved to Dead-Letter Queues.
RDS has two type of backups; Automated, Snapshot, both of which is stored in AWS-managed S3 Bucket (you can’t see them within your S3).
Because S3 is regionally-resilient, backup is also reslient.
How backup works – Snapshots: Snapshots aren’t automatic, you run it by script or manually. They function like EBS snapshot. First copy is the full copy of DB, and then incrementer after. Whenver snapshot occurs, there’s a breif moment of interruption (this may impact your app if you’re single AZ).
Automatic backup: happens once a day. Think of it as automated backup.
Retention period: amount of day you can recover your data up to; eg: 35 retention period allow you to recover data 35 days ago